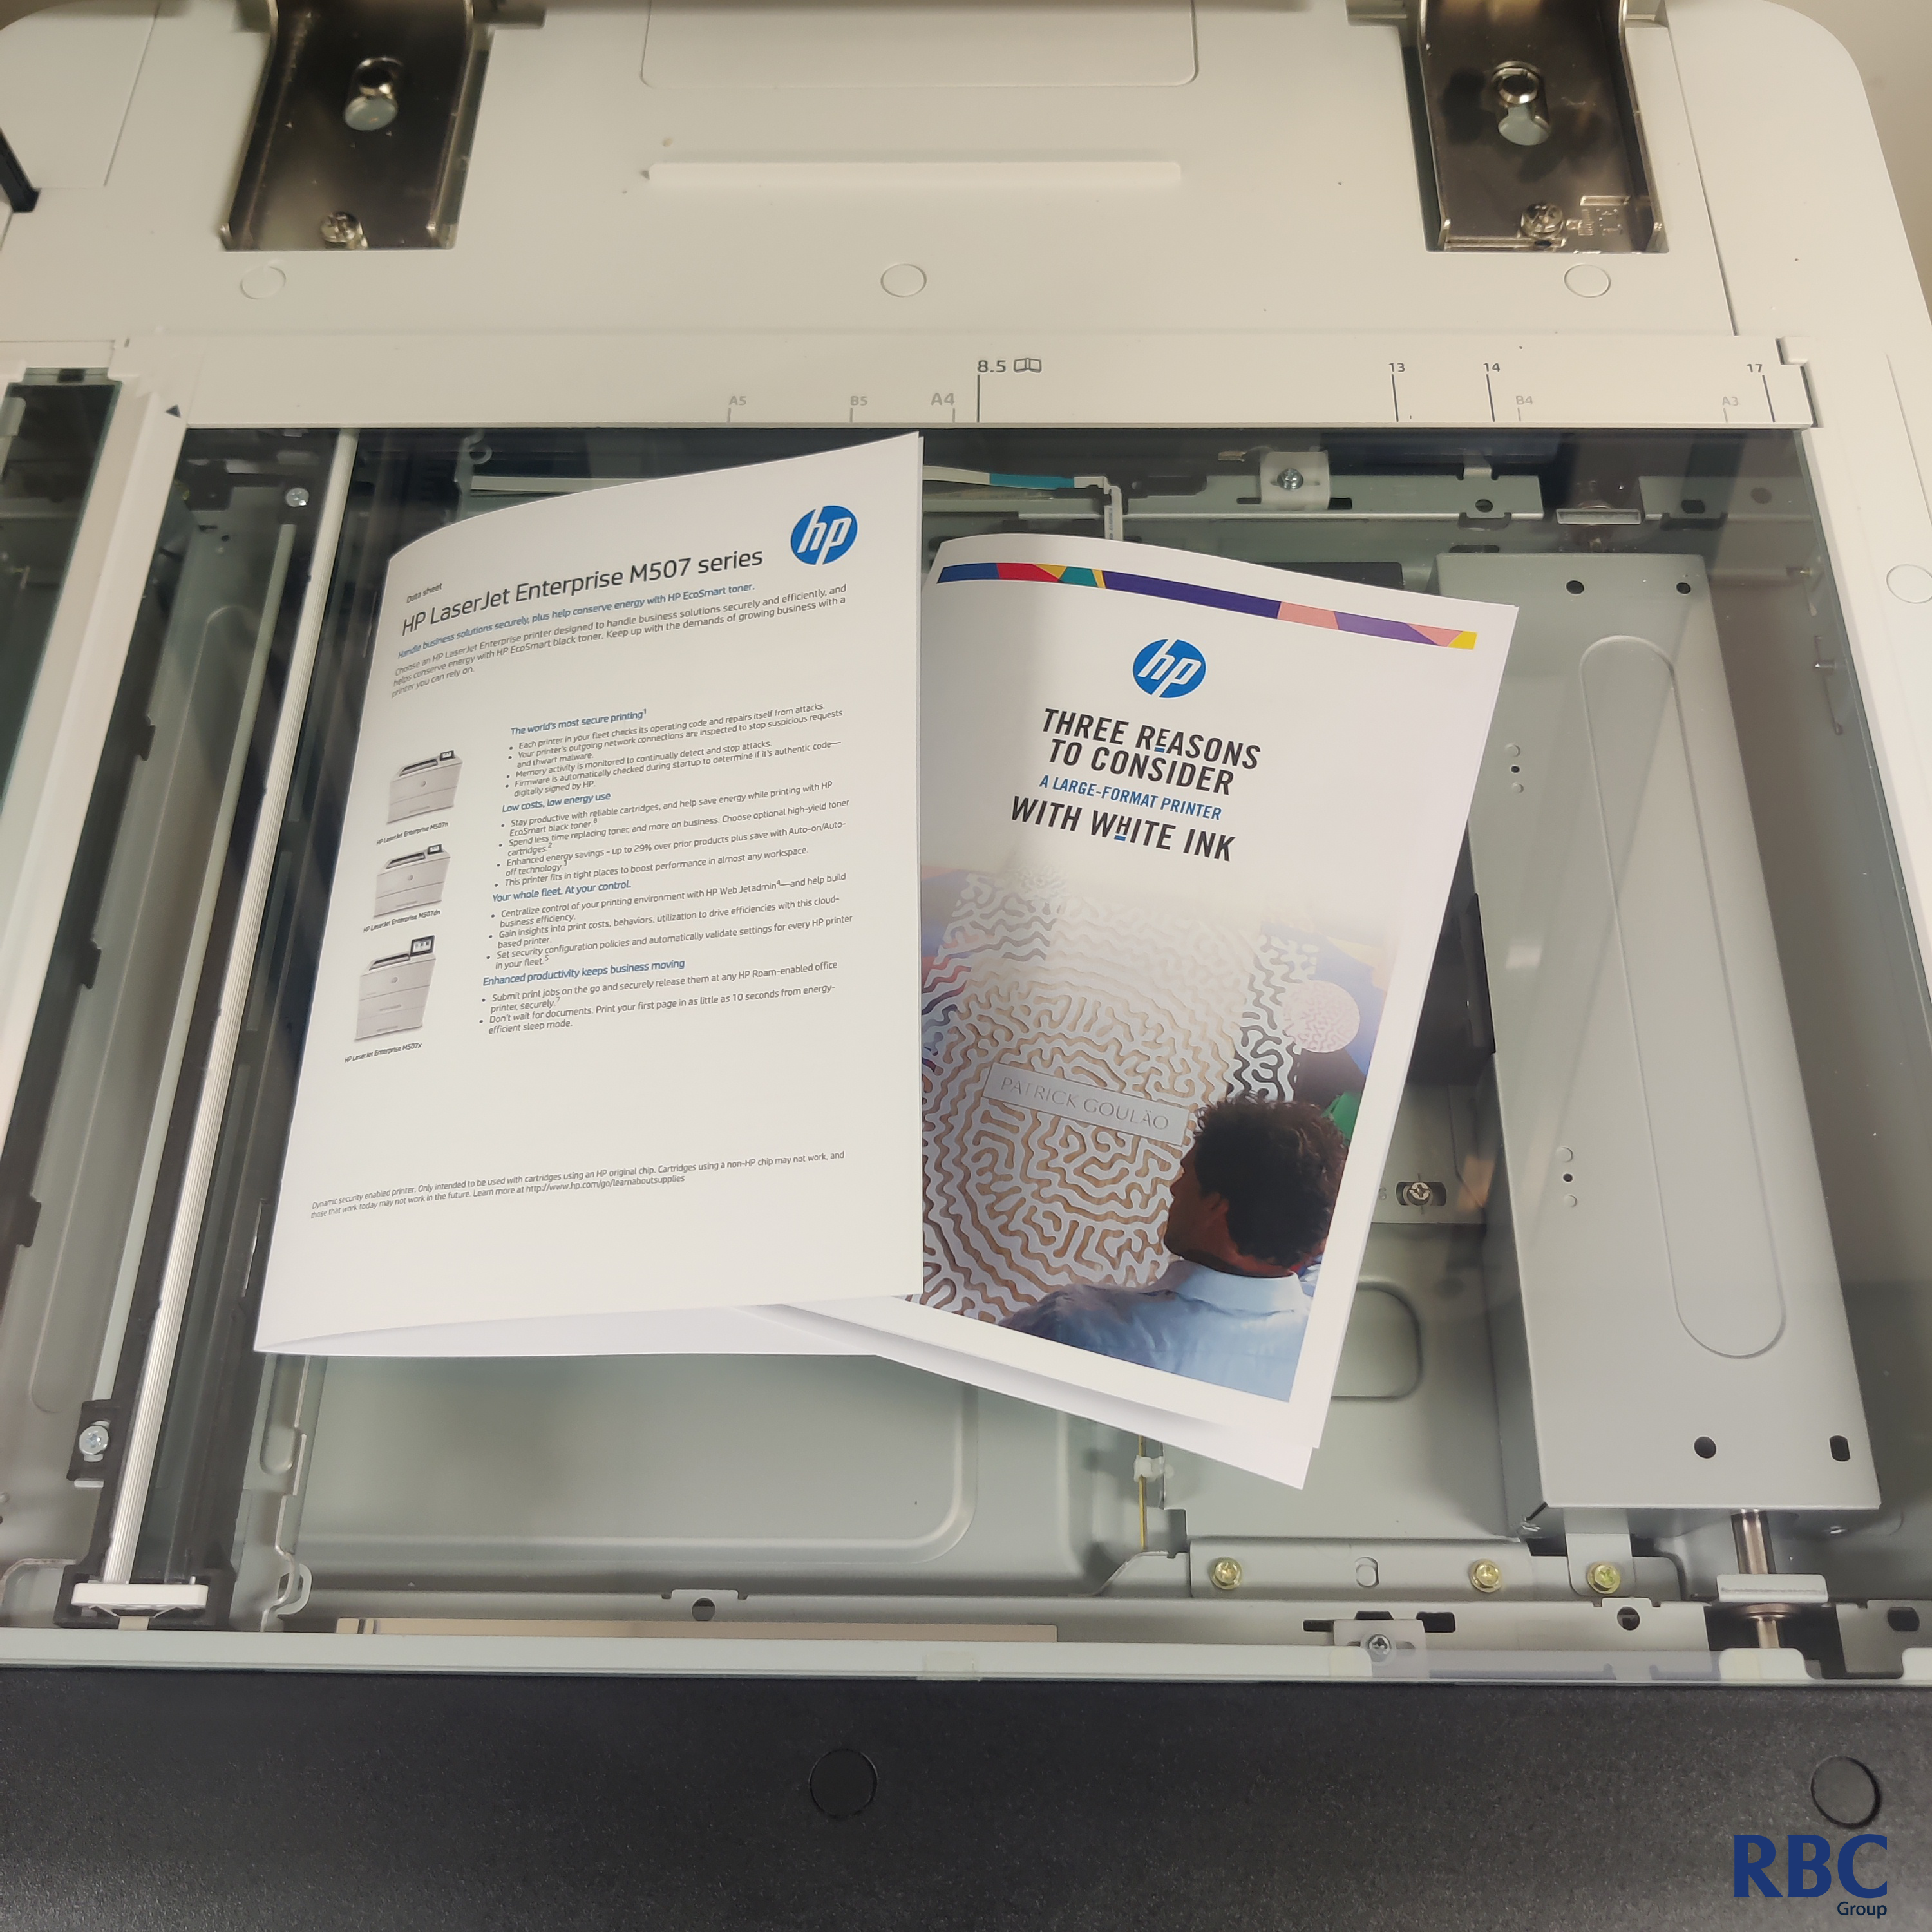
This guide will show the correct driver settings to have for printing an A3 booklet (pictured below).
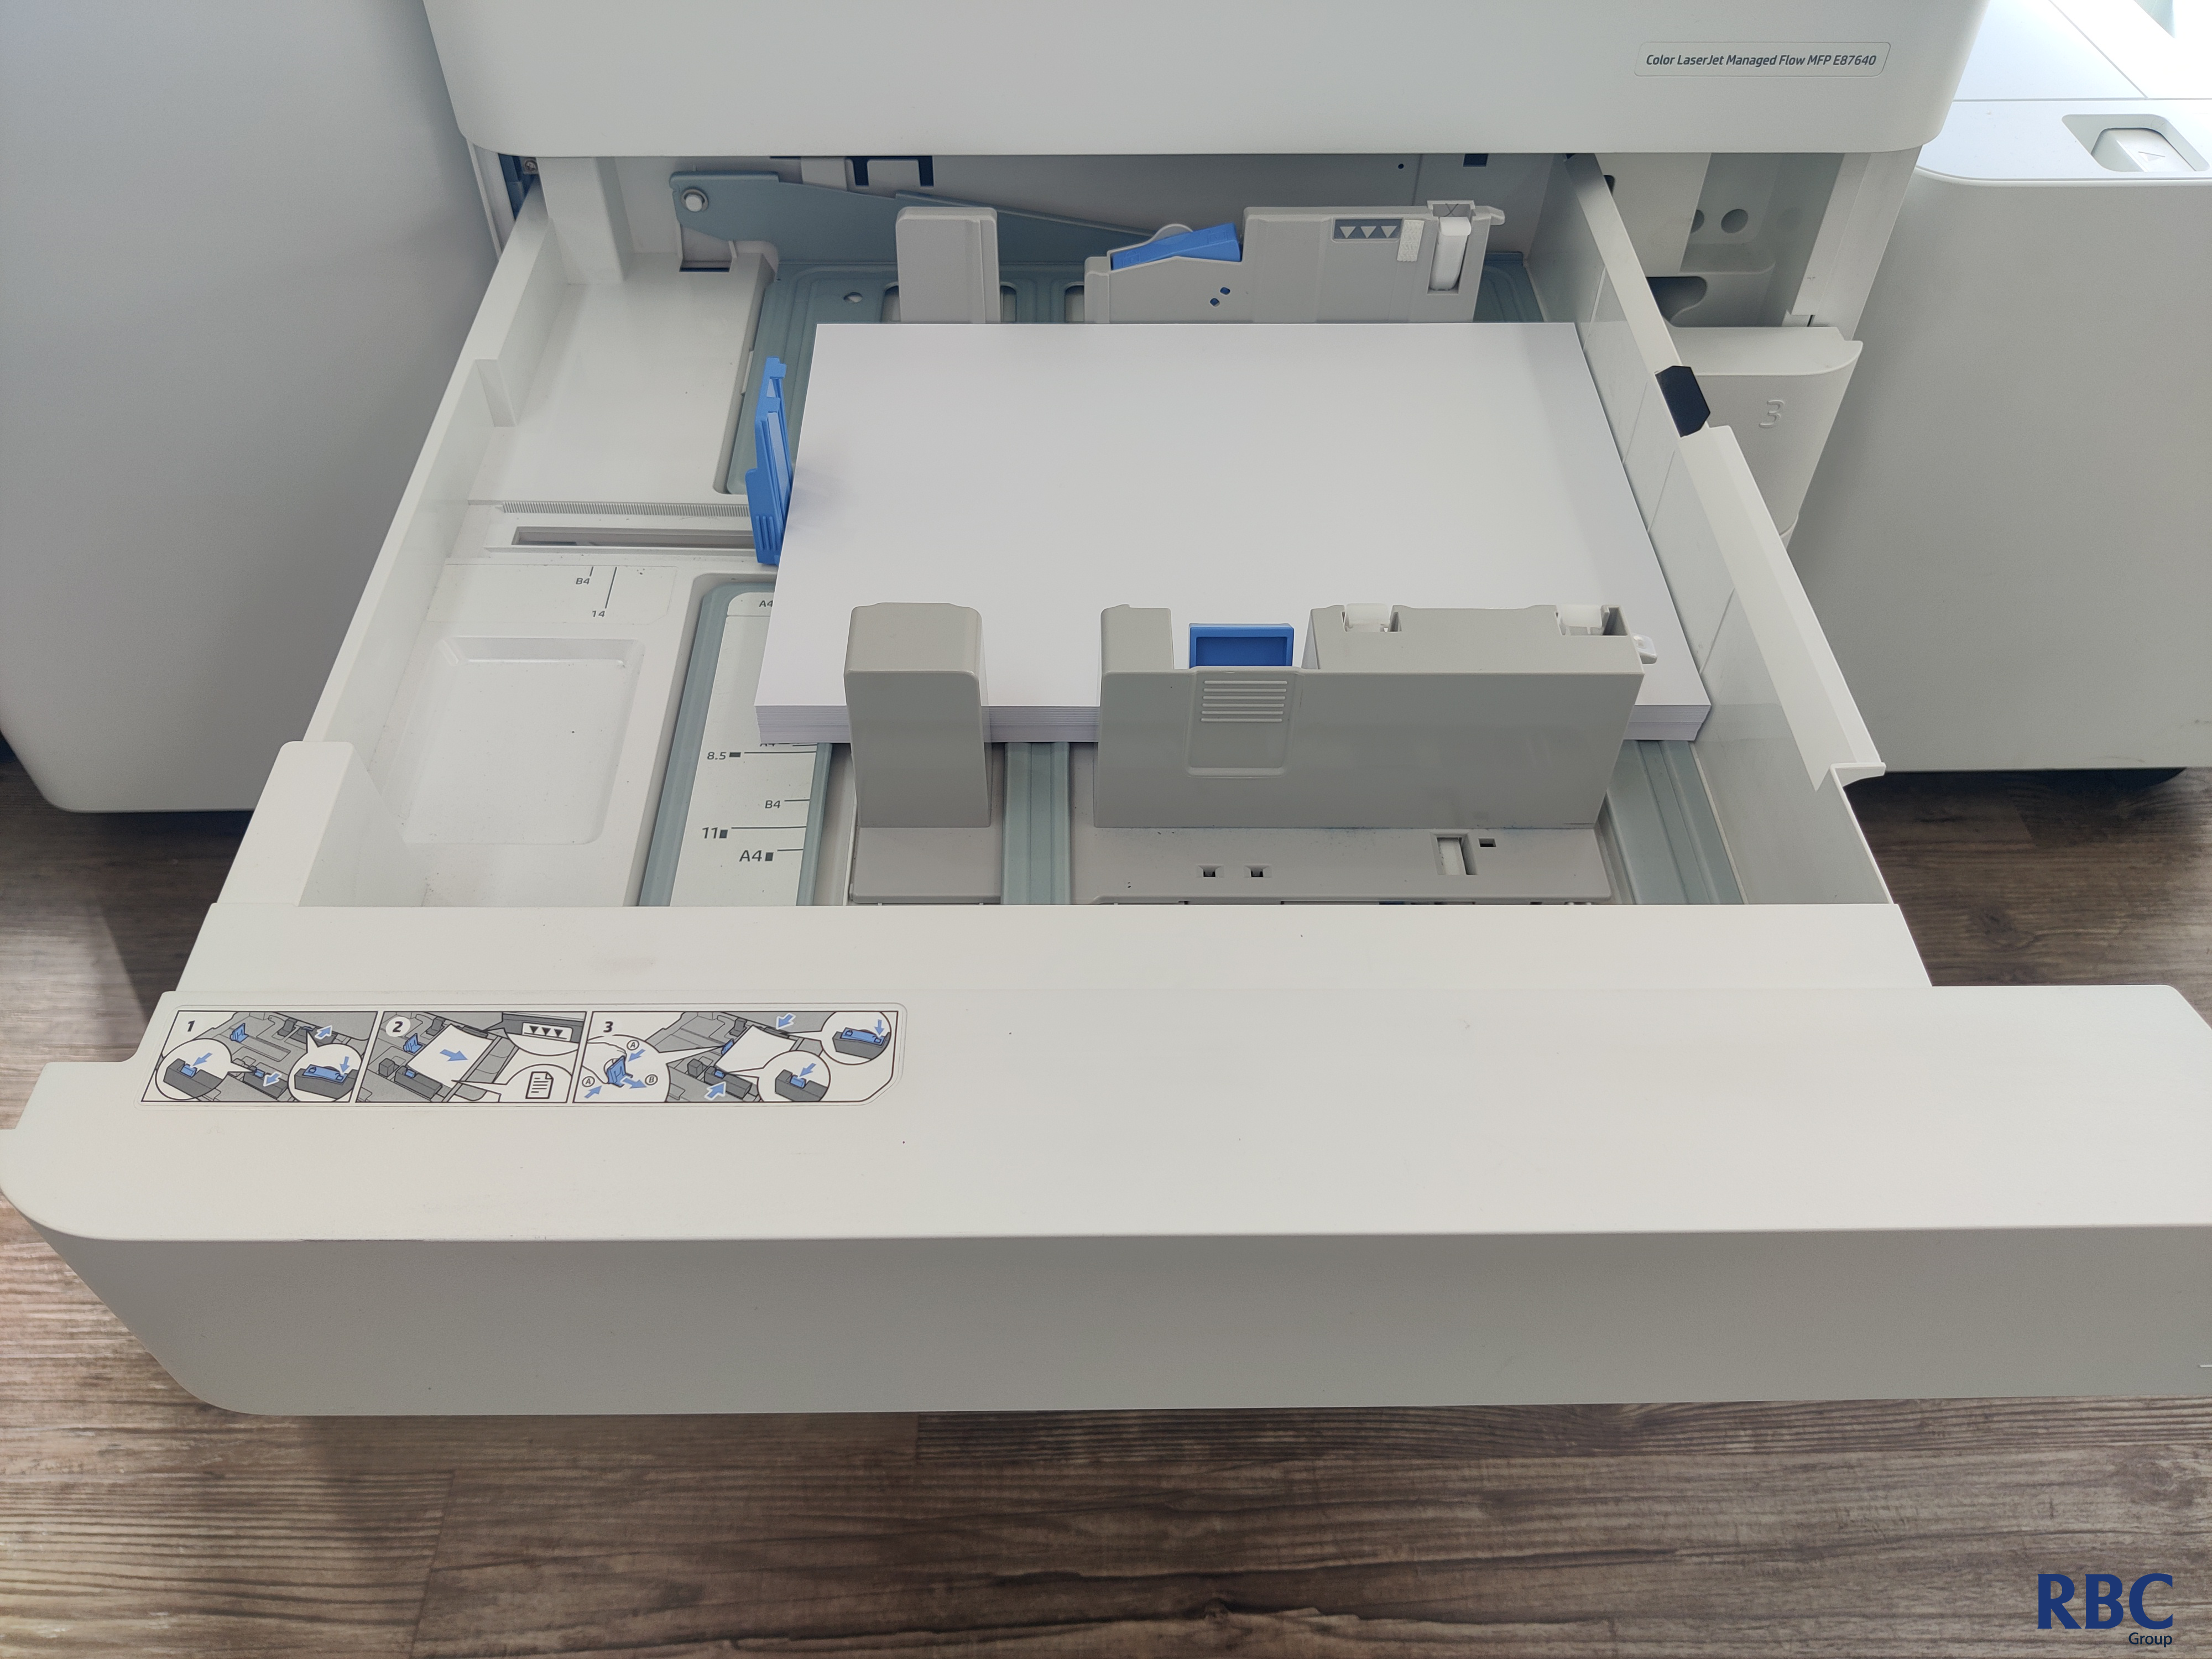
1. Make sure the paper is orientated to landscape in the desired paper tray.
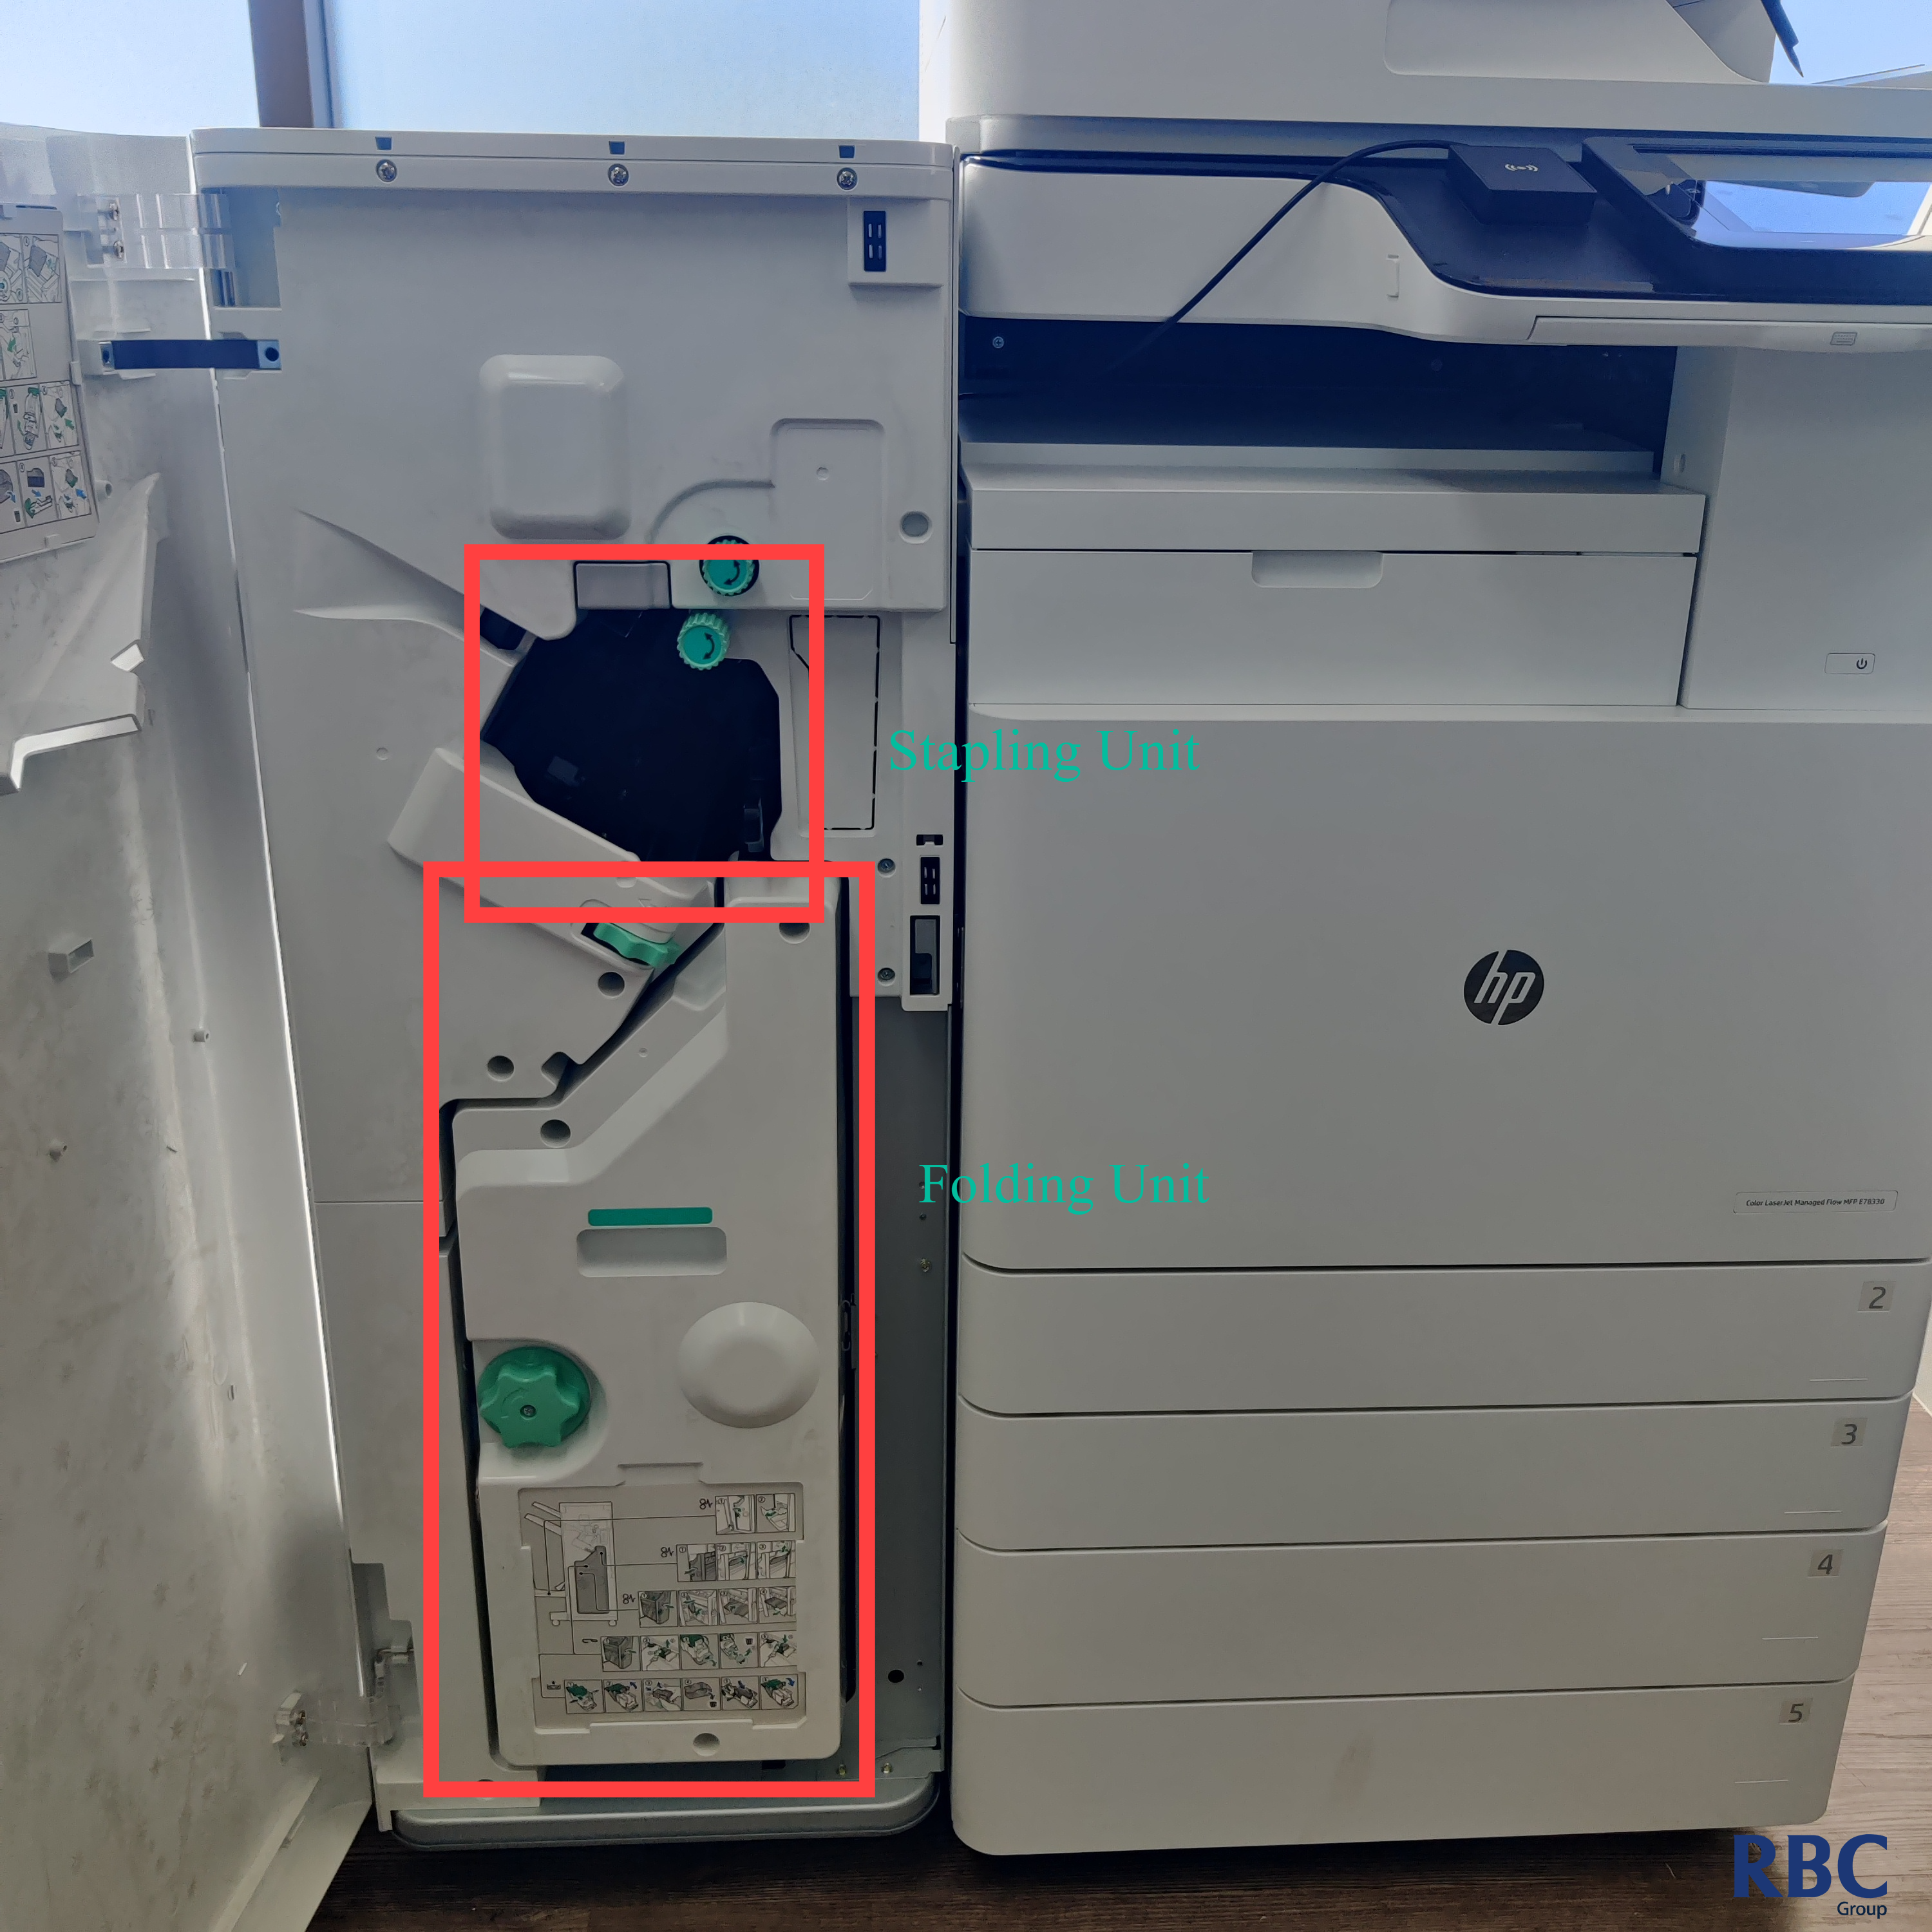
2. Check your finishing unit on the left side of the printer by opening up the door. Please confirm you have the stapling and folding units installed.
3. Please check you driver and make sure you have the PCL 6 universal drivers, a printer specific driver will work as well. If you are unsure as to your current driver you can follow the guide below going to the “Verifying Print Driver for Incorrect Print Driver” tab.
Slow Printing on HP printers – RBC Business Solution Pty Ltd (rbcgroup.com.au)
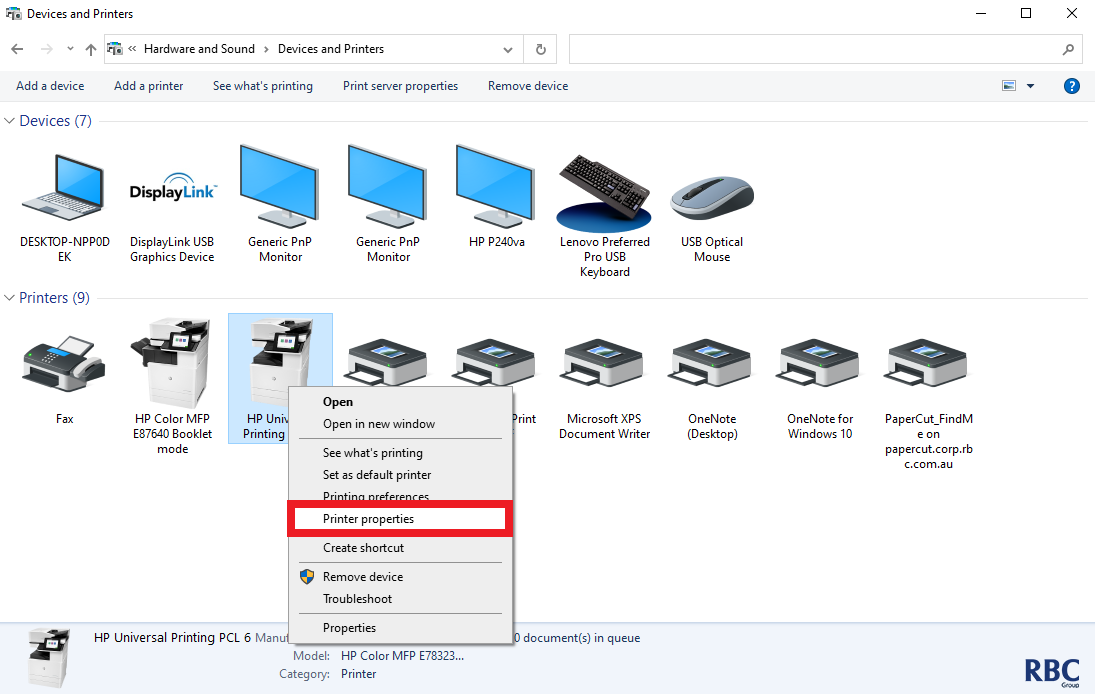
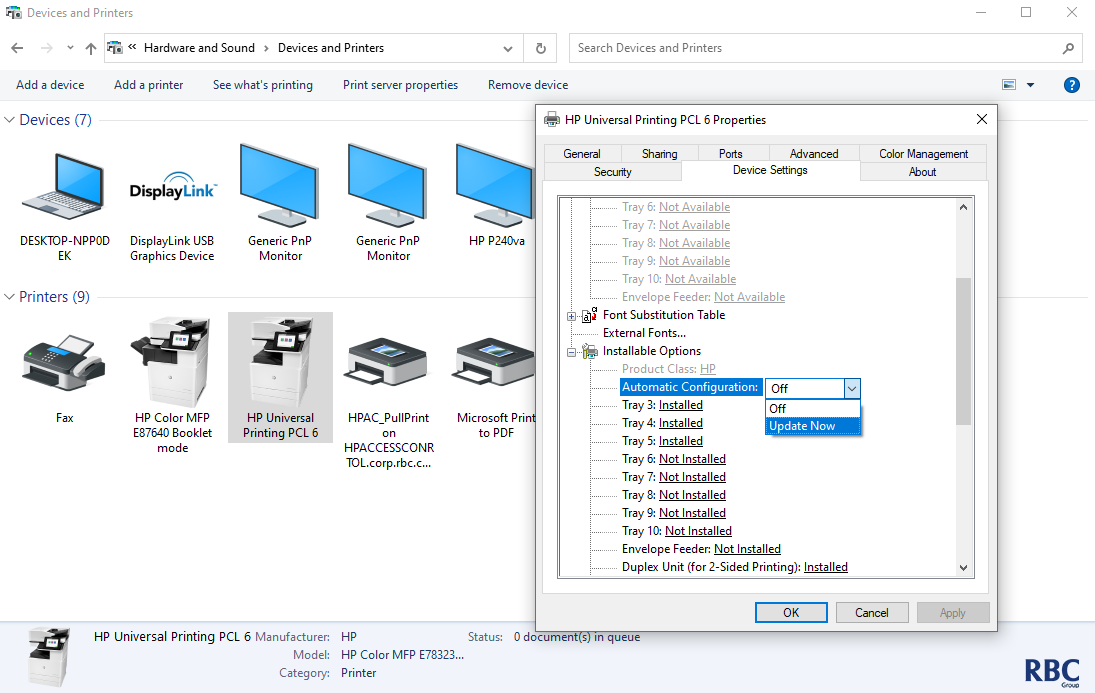
3. Once the driver is set up you can run a check to detect the finishing unit. First go to printer properties.
4. Go to device settings and scroll down to Automatic Configuration, select the update now button and this will detect if the finisher unit has been installed.
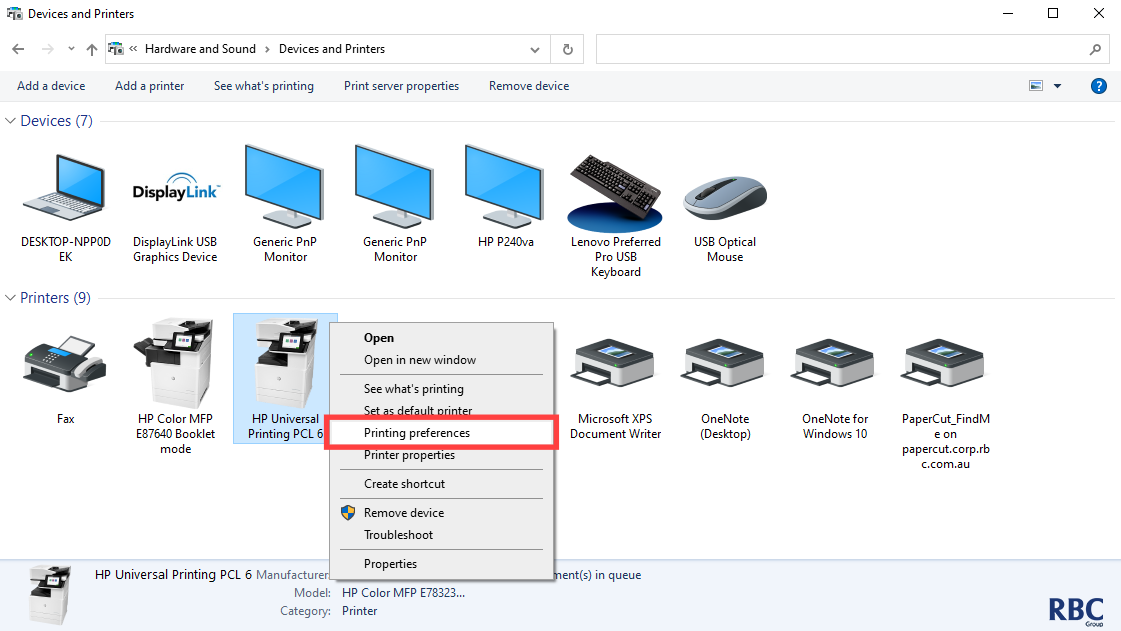
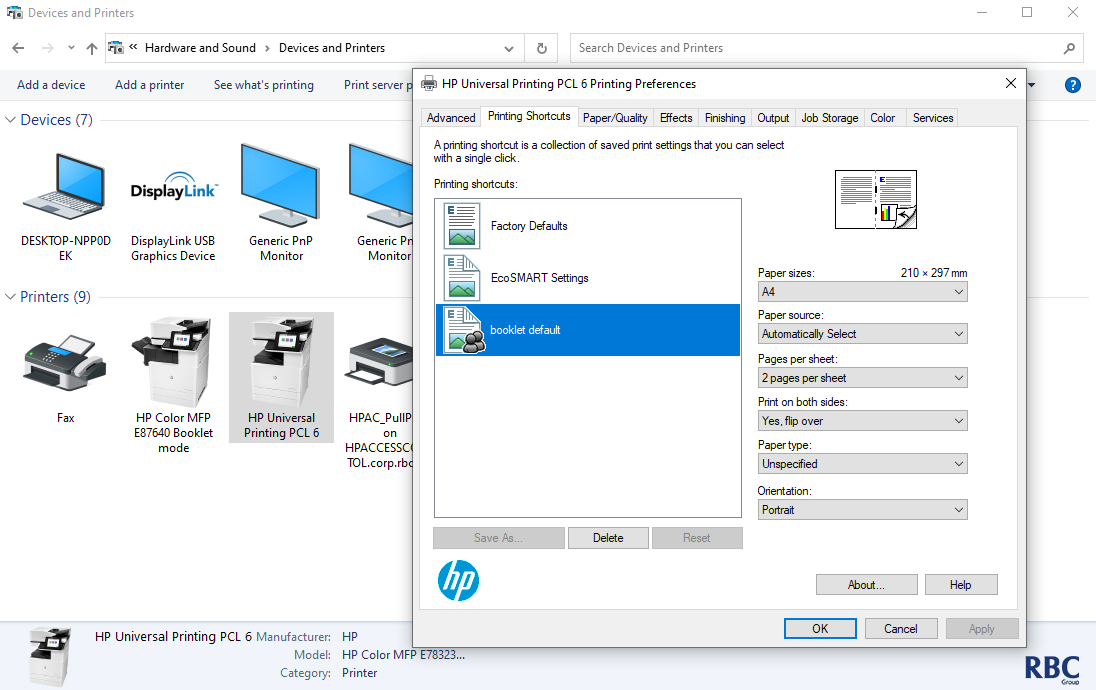
3. Next, go to printer preferences on the printer.
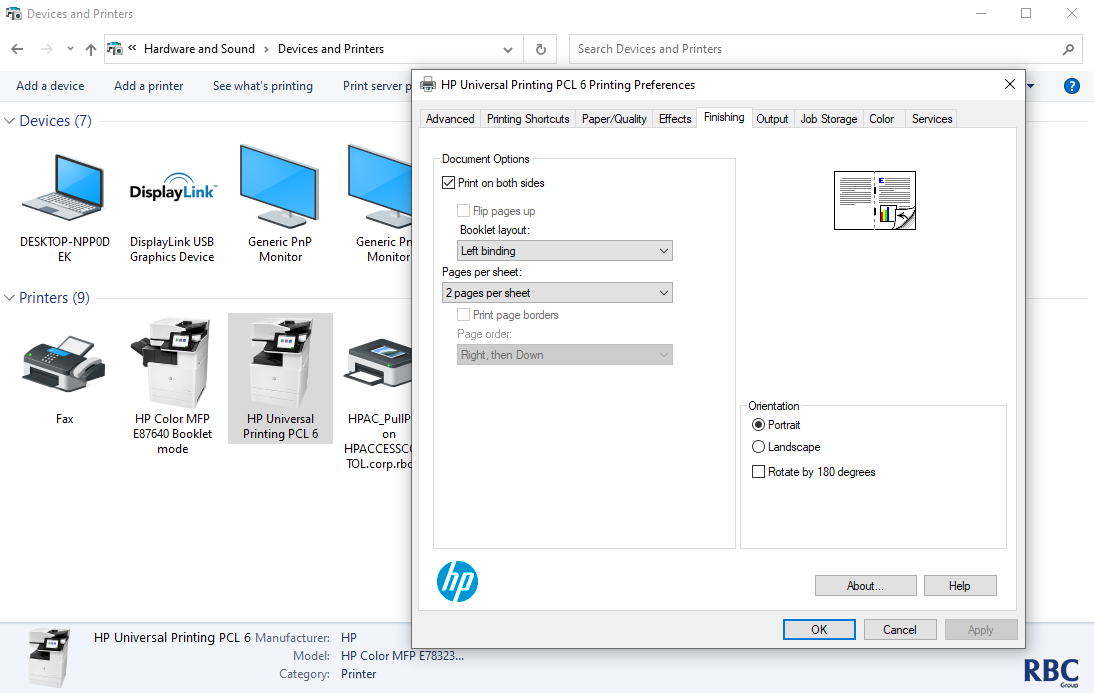
4. Go to the finishing tab, for standard booklets please tick Print on both sides, set Booklet Layout to Left binding, and pages per sheet to 2 pages per sheet.
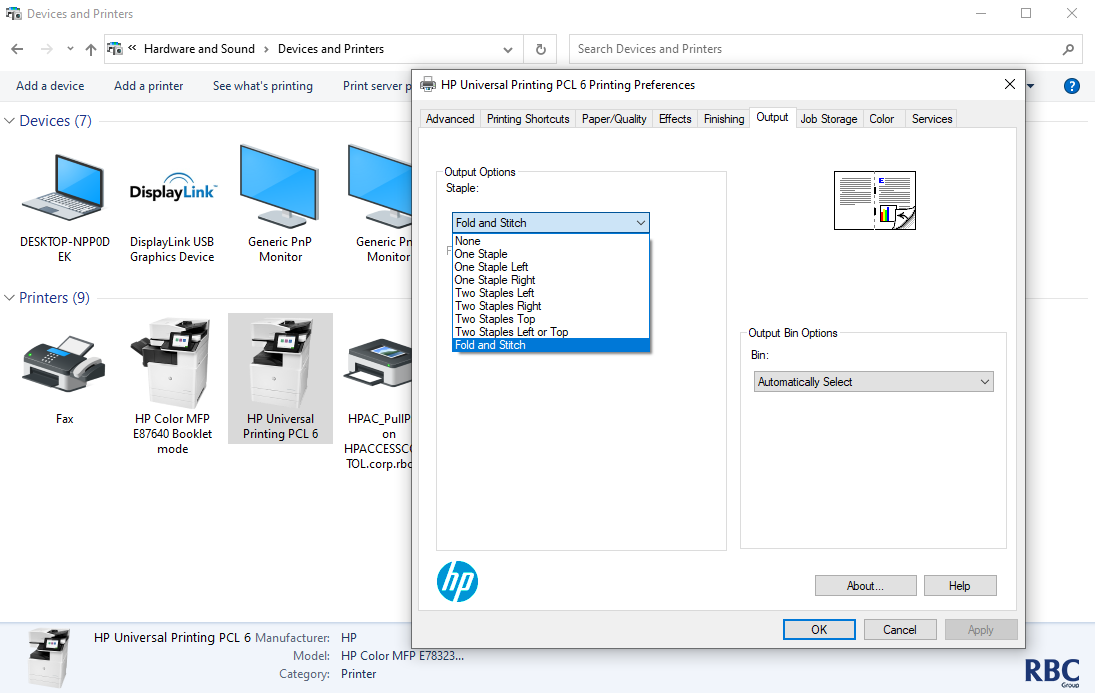
5. In the output tab please select fold and stitch.
6. Once these settings have been entered, save the shortcut under a new name.
Once this process is complete, the driver will be set up for printing booklets.
Please note:
- Documents for booklet printing should be formatted in A4 style.
- There is a maximum of 25 pages you can have in booklet printing. Prints over this amount will be printed without folding or stapling.
The below HP Video may also help with setting up the driver settings: